Simple Steps to Brine a Turkey: Prep Your Best Holiday Meal
The quest for the perfect holiday turkey often ends in disappointment: dry breast meat, bland flavors, and a less-than-tender texture. But what if we told you there was a simple, transformative technique that guarantees a juicy, flavorful, and incredibly tender bird every single time? Enter the wondrous world of turkey brine. Brining a turkey is a time-tested secret weapon that elevates your holiday meal from good to absolutely unforgettable.
Imagine slicing into a roasted turkey where every bite is moist, infused with aromatic herbs and spices, and so tender it practically melts in your mouth. This isn't just wishful thinking; it's the consistent result of a properly brined turkey. Whether you're roasting a traditional store-bought bird for Thanksgiving or preparing a wild turkey that demands extra care, incorporating a turkey brine into your prep routine is undeniably worth the minimal effort. It's a simple step that yields monumental results, turning a potentially daunting cooking task into a guaranteed success story.
What is Turkey Brine and Why Bother?
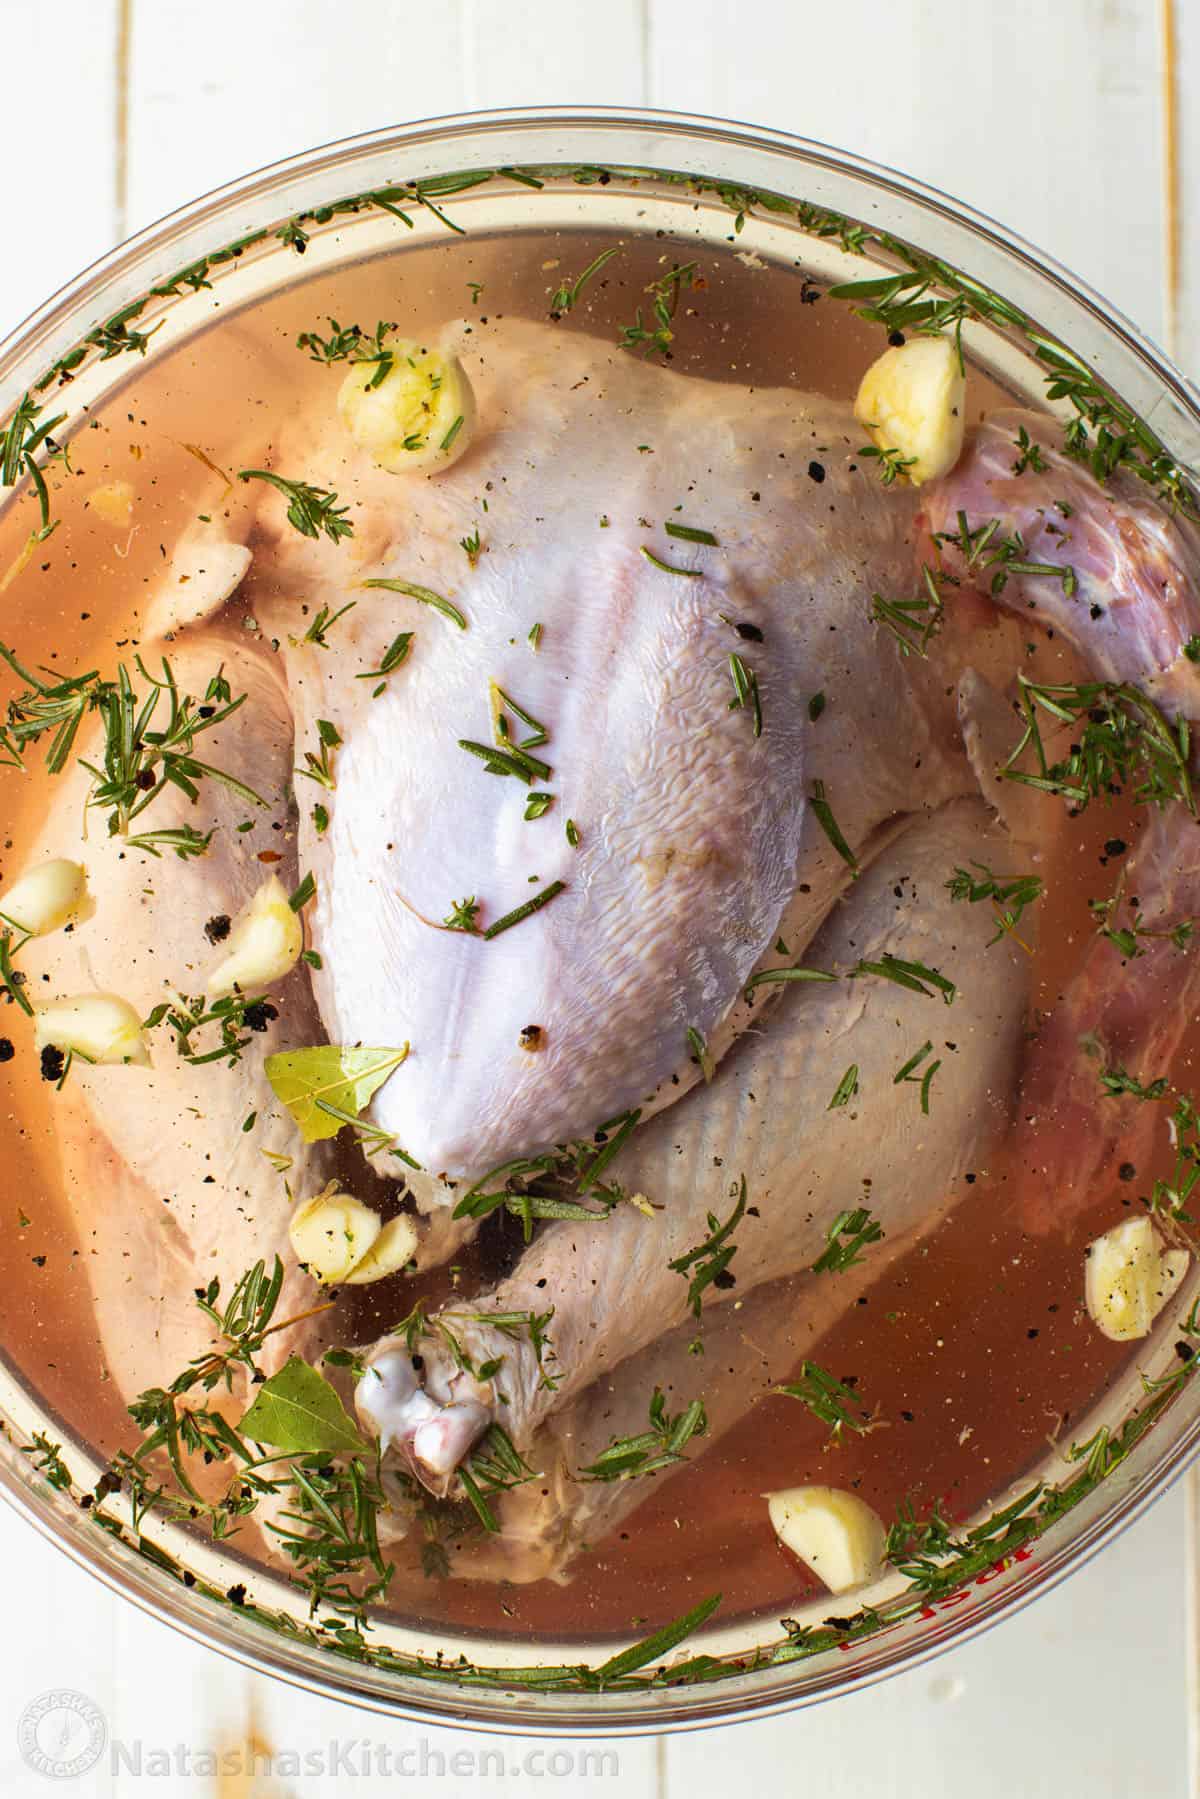
At its core, a turkey brine is a seasoned, salted liquid in which a raw turkey soaks for an extended period before cooking. This isn't just about adding flavor to the surface; it's a profound transformation that penetrates the meat itself. Think of it as a pre-emptive strike against dryness and an intensive flavor bath for your bird.
The magic of a turkey brine lies primarily in the salt. When turkey meat is submerged in this saline solution, a process called osmosis occurs. The salt molecules work to break down the tough protein fibers within the turkey. As these fibers relax and unwind, they lose some of their natural moisture. However, because the surrounding liquid is also highly seasoned and salty, the turkey meat then reabsorbs some of that flavorful, moisture-rich brine. This intricate exchange means the turkey essentially plumps up with the seasoned liquid, making it far more resistant to drying out during the high heat of roasting or smoking.
Beyond moisture, brining also infuses the turkey with a symphony of flavors. The herbs, spices, citrus, and other aromatics you add to your brine aren't just for show; their essences are drawn into the meat along with the moisture. This results in a bird that's not just tender and juicy, but also rich with a depth of flavor that a simple seasoning rub can't achieve alone. It's the secret to getting that delicious, restaurant-quality taste in your own kitchen. For a deeper dive into how this scientific marvel works, explore
The Science of Brining: How Salt & Citrus Tenderize Turkey.
Essential Ingredients for a Perfect Turkey Brine
Crafting the ideal turkey brine is surprisingly straightforward, relying on a few key components working in harmony. You'll combine water with a handful of whole-food ingredients and spices to create a liquid that will transform your turkey.
*
Salt: The Non-Negotiable Hero: Salt is the undeniable star of any brine recipe. Its sodium content is the main mineral responsible for penetrating the meat, breaking down muscle fibers, and facilitating moisture retention. While you can use table salt,
kosher salt is generally preferred by chefs and home cooks alike. Its larger crystals make it easier to measure accurately by volume without over-salting, and it dissolves beautifully. Canning salt is another viable option, often with fine crystals but without anti-caking agents found in some table salts. Always specify the type of salt in your recipe, as measurements vary significantly.
*
Acids: Brightness and Tenderness: Ingredients like fresh lemons and oranges do more than just add a bright, zesty flavor. Their acidity further assists in tenderizing the turkey meat, contributing to that desired melt-in-your-mouth texture. A touch of vinegar, such as apple cider or white wine vinegar, not only balances the saltiness and sweetness of the brine but also adds a layer of complex flavor.
*
Sweeteners: Balance and Browning: A modest amount of brown sugar, honey, or maple syrup helps to balance the saltiness, adding a subtle sweetness to the brine. It also aids in dissolving the other ingredients and can contribute to a beautiful, golden-brown skin during roasting.
*
Aromatics & Spices: The Flavor Infusion: This is where you can truly customize your brine. Minced garlic, whole black peppercorns, fresh rosemary, thyme sprigs, bay leaves, and even sliced onions can infuse your turkey with incredible depth of flavor. These ingredients permeate the meat, giving it a delicious, aromatic essence from the inside out.
*
Water: The Carrier: The foundation of your brine. It acts as the vehicle for all these wonderful flavors and the mechanism for the salt to work its magic.
Step-by-Step Guide to Brining Your Turkey
Brining a turkey might sound like a gourmet endeavor, but it's remarkably simple and requires minimal active time. The majority of the process is hands-off, allowing the brine to do its work. Here are the basic steps to ensure a perfectly prepped bird:
Step 1: Prepare Your Brine Solution
In a large pot on your stovetop, combine a generous amount of water (typically ½ to 2 gallons, depending on your turkey size and recipe), your chosen salt, sweeteners, acids, and aromatics. Heat the mixture over medium-high heat, stirring occasionally, just until it begins to simmer. This gentle heat helps to fully dissolve the salt and sugar, ensuring an even distribution of flavor. Once simmering, remove the pot from the heat and allow the brine to cool completely to room temperature. This step is crucial for food safety; pouring hot or even warm brine over a raw turkey can encourage bacterial growth or prematurely cook the outer layers of the meat. For convenience, you can prepare the brine up to two days in advance and store it in the refrigerator until needed.
Step 2: Submerge and Secure Your Turkey
First, ensure your turkey is fully thawed. Then, choose your brining vessel. A large, food-grade bucket, a heavy-duty brining bag (often found with roasting supplies), or a very large stock pot or roasting pan will work. Place the thawed turkey into your chosen container. Carefully pour the completely cooled brine solution over the turkey, ensuring the entire bird is fully submerged in the liquid. If needed, you can add a little more cold water to achieve full submersion, though this may slightly dilute the brine. Some people use a plate or a weighted object to keep the turkey from floating to the surface.
Step 3: Refrigerate and Relax
Once the turkey is fully submerged, securely close the brining bag or cover the container with a lid or plastic wrap. Transfer the turkey to your refrigerator. This is the hands-off part! Let the turkey soak for at least 12 hours, and ideally between 24 and 48 hours. For most 12- to 15-pound turkeys, 24 hours is a sweet spot, providing ample time for the brine to work its magic without making the turkey overly salty. Longer brining times (up to 48 hours) might be beneficial for larger birds or those with thicker breast meat.
For a straightforward recipe to get you started, check out
Easy Turkey Brine: Get Your Juiciest, Most Flavorful Bird.
Tips for Brining Success and Advanced Insights
While the basic steps are simple, a few additional tips can elevate your turkey brining experience even further.
*
Temperature Control is Paramount: Always ensure your brine is completely chilled before adding the turkey. Similarly, the turkey must remain in the refrigerator throughout the entire brining period. Never brine a turkey at room temperature.
*
Rinsing After Brining: Some chefs recommend a quick rinse of the turkey under cold water after removing it from the brine. This can help wash away any excess salt from the surface, preventing the skin from becoming too salty during cooking. Pat the turkey thoroughly dry with paper towels immediately after rinsing to promote crispy skin.
*
Pat Dry for Crispy Skin: Whether you rinse or not, thoroughly patting the turkey dry before seasoning and roasting is critical for achieving that coveted golden-brown, crispy skin. Moisture on the surface will steam the skin rather than crisp it.
*
Choosing the Right Vessel: Brining bags are convenient and take up less space than large pots. Food-grade buckets are sturdy and often used for larger turkeys or multiple small birds. Always ensure your chosen container is clean, food-safe, and can be securely covered.
*
Adjusting for Turkey Size: While the brine recipe itself often remains consistent, the brining time may vary. A smaller turkey (under 10 pounds) might only need 12-18 hours, while a very large bird (over 20 pounds) could benefit from the full 48 hours. When in doubt, err on the side of a shorter brine time rather than an overly long one to avoid an excessively salty turkey.
*
Consider Dry Brining: While this article focuses on wet brining, it's worth noting that dry brining (rubbing the turkey with a salt mixture and letting it sit uncovered in the fridge) is another excellent method for achieving similar results, particularly crispy skin. However, wet brining is often praised for its superior moisture infusion.
*
Don't Brine a Pre-Brined Turkey: Many commercially available turkeys, especially frozen ones labeled "kosher," "enhanced," or "self-basting," have already been injected with a saline solution. Brining these turkeys can result in an unpleasantly salty bird. Always check the label.
A Meal to Remember
The effort required to prepare a turkey brine is minimal, but the payoff is immense. You'll be rewarded with a holiday centerpiece that is consistently juicy, tender, and bursting with flavor. Brining transforms a simple raw turkey into a culinary masterpiece, ensuring that your best holiday meal is not just a hope, but a delicious reality. So, take these simple steps, embrace the power of the turkey brine, and prepare to impress everyone at your table with a bird that truly stands out. Your guests—and your taste buds—will thank you.